
🐶 DIY Rope Dog Toy for Heavy Chewers
🐶 DIY Rope Dog Toy for Heavy Chewers
This one takes a bit longer but the rewards is well worth the effort
Tough. Simple. Tail-wagging approved.
If your pup shreds toys like they’re on a mission, this one’s for you. Using high-strength rope and a few knots, you can make a durable tug or chew toy that holds up to even the gnarliest jaws.

These easy to make colorful rope toys are great for any size dog. Just scale up or down the diameter of the rope to fit your dog, 1/4" for small dogs or 3/8" for large dogs. Directions given are for a basic toss/tug toy pictured below. Pictured are several variations based on the basic knot that can be created with a little practice and creativity.
Step 1: Finding Center of Two Lengths of Rope

Start with two equal lengths of rope, I recommend no shorter than 5' each length. Find the middle of each length by folding the rope in half and lining up the cut ends.
Step 2: Finding Middle of Each Rope


After locating the middle of each rope, cross each rope at right angle to other rope.
Step 3: Secure With Small Zip Tie
Then use a small zip tie to secure to the two lengths together at the centers.
Step 4: Begin the Knot

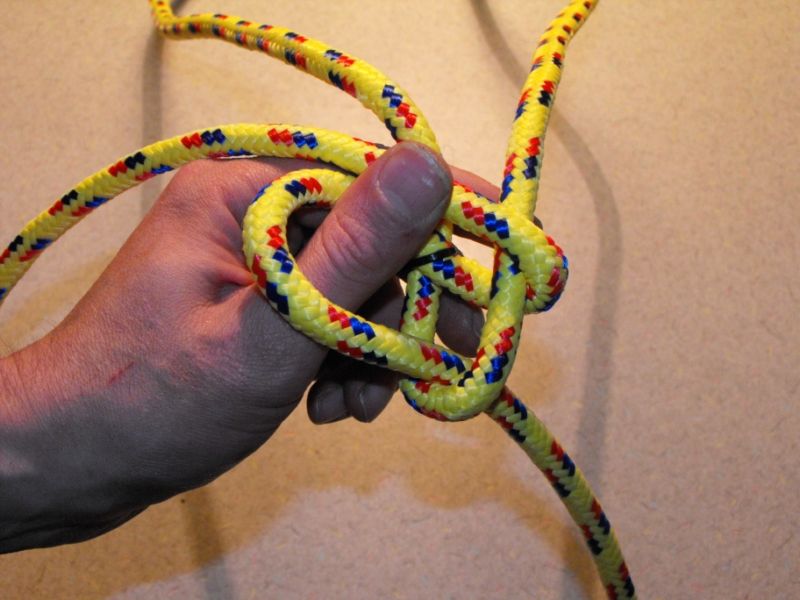
Lay crossed ropes over fisted hand with thumb extended.
Step 5: Loop Around Thumb


5 More Images
Loop first rope around thumb and over second rope, using thumb to hold first rope in place (see image)
Step 6: Loop Second Rope
Loop second rope over first rope and go over rope three, using thumb to hold in place.
Step 7: Loop Third Rope
Loop third rope over second rope and go over forth rope, use thumb to hold third rope in place.
Step 8: Loop Fourth Rope


Loop fourth rope over third rope and then insert fourth rope into loop created by first rope.
Step 9: Tighten Up Loops

Tighten each rope by pulling the tail of each rope.
Step 10: Continue to Tighten Loops
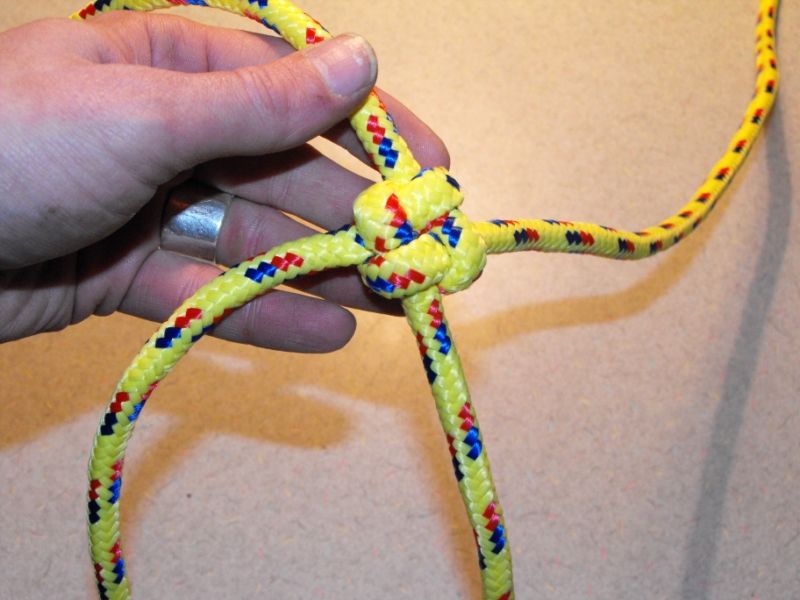
Pull all ropes tight until a small four section knot is created.
Step 11: Trim Off Zip Tie

Trim off zip tie tail, and place knot with zip tie side facing up.
Step 12: Repeat Steps 5-9

Repeat steps 5-9. Loop first rope around thumb and over second rope.
Step 13: Repeat Steps 5-9

Repeat steps 5-9. Loop second rope over first rope and over third rope holding in place with thumb.
Step 14: Repeat Steps 5-9

Repeat steps 5-9. Loop third rope over second rope and over fourth rope holding in place with thumb.
Step 15: Repeat Steps 5-9

Repeat steps 5-9. Loop fourth rope over third rope and feed tail of fourth rope into loop created by first rope.
Step 16: Tighten Up All Ropes


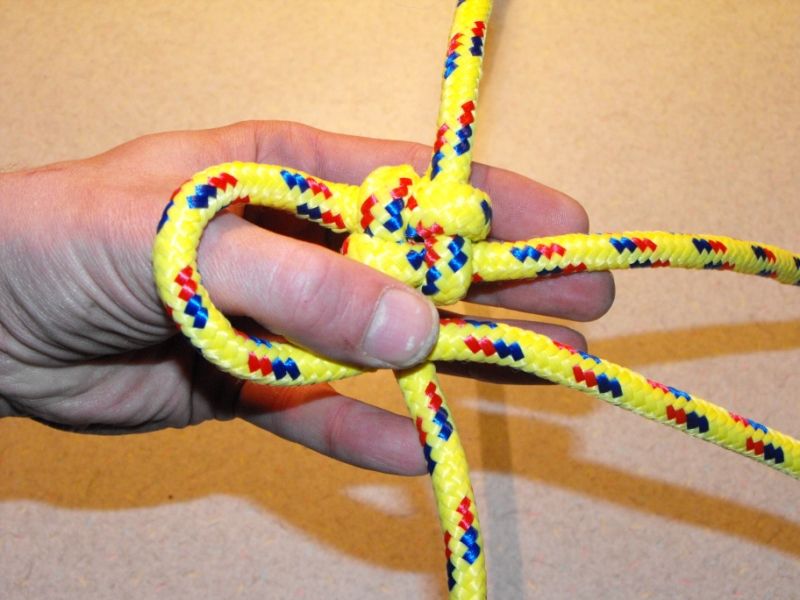
Continue to tighten up all ropes pulling together to form a four section tight knot.
Step 17: Tightened Knot


Tightened knot shown here from above and side view.
Step 18: Repeat Steps 5 Thru 9


3 More Images
5. Loop first rope around thumb & across the top of the second rope .
6. Loop second rope around first rope & across the top of the third rope .
7. Loop third rope around second rope & across the top of the fourth rope .
8. Loop fourth rope around third rope & insert tail end of fourth rope into loop made with first rope .
6. Loop second rope around first rope & across the top of the third rope .
7. Loop third rope around second rope & across the top of the fourth rope .
8. Loop fourth rope around third rope & insert tail end of fourth rope into loop made with first rope .
9. Tigthen up all ropes until a tight four section knot appears
Repeat until only short lengths of each rope remain
Step 19: Repeat Steps 5 Thru 9 Until Only Short Lengths of Rope Remain


Repeat steps 5 thru 9 until only short lengths of rope remain
Step 20: Tucking in Tails & Finishing Off


Insert hemostats or needle nose pliers into knot grabbing one
rope tail and pulling it threw knot.
rope tail and pulling it threw knot.
Step 21: Continue Pulling Rope Tails Threw Knot
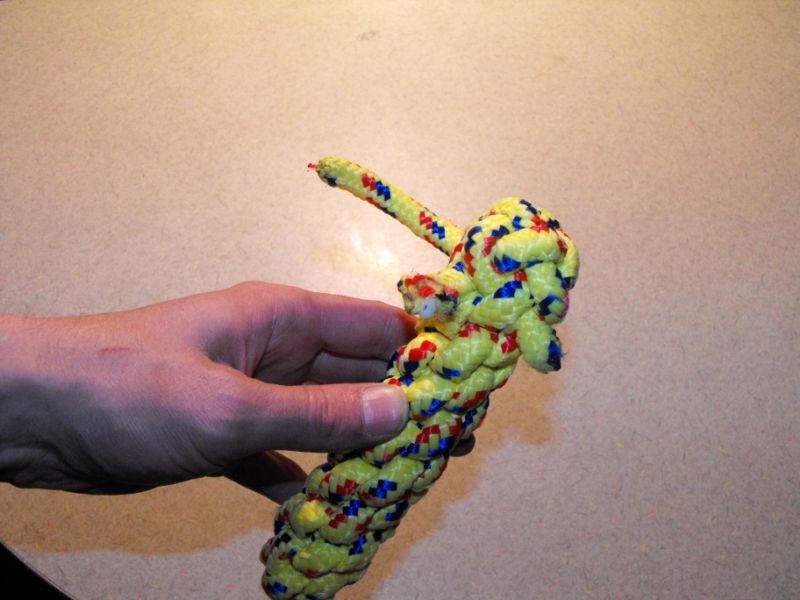
Continue pulling rope tails threw knot.
Step 22: Trim Back All Rope Tails
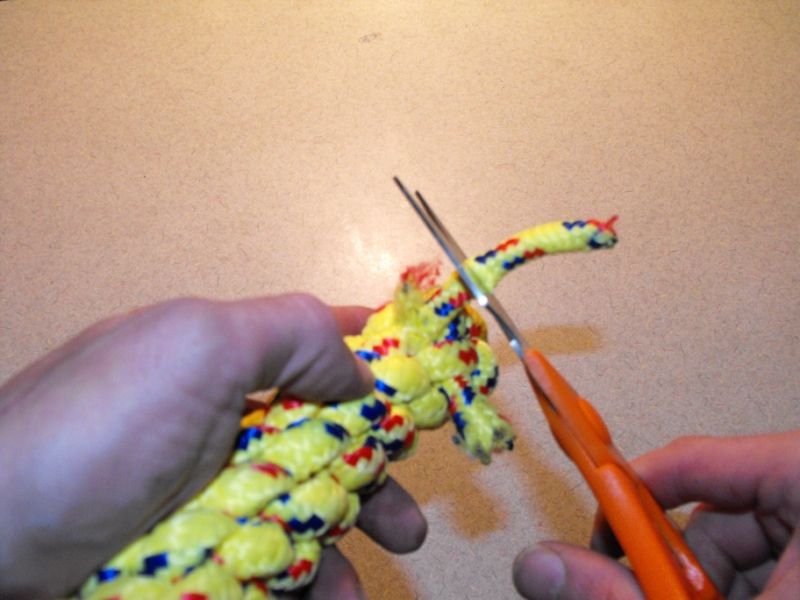
Trim back all rope tails
Step 23: Trim Away Center Core of Rope

Push back outside braided cover & to expose central core and trim away to reveal leaving only the outer nylon cover
Step 24: Melt the Exposed Nylon Rope and Push Back With Side of Lighter

Melt the exposed nylon rope and push back with side of lighter
Step 25: Finished Dog Toy
